View the details of a single asset
The Assets page provides details about all assets. These details include basic information, alert management status, baseline check analysis, and asset fingerprints. This topic describes how to view the details of a server or a cloud service.
Context
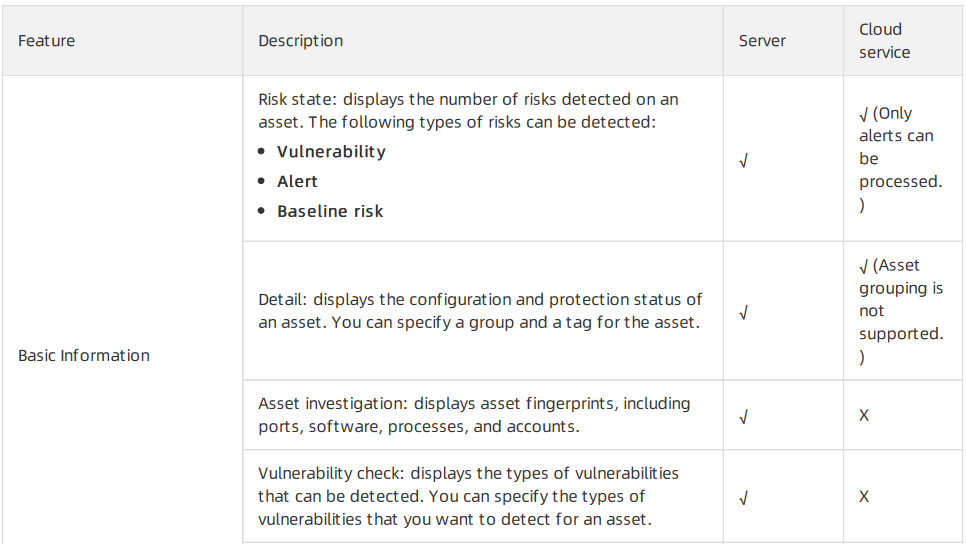
The basic information about assets is displayed on the Assets page. Different types of assets, such as servers and cloud services, are managed in different ways. The following table lists the features that are supported by servers and cloud services on the Assets page. The The following list describes the marks that are used to indicate whether a feature is supported by servers or cloud services:
- Cross (×): not supported.
- Tick (√): supported.
Operation Steps
In the product management page, choose "Threat Detection Service".

In the left-side navigation pane, click "Assets".
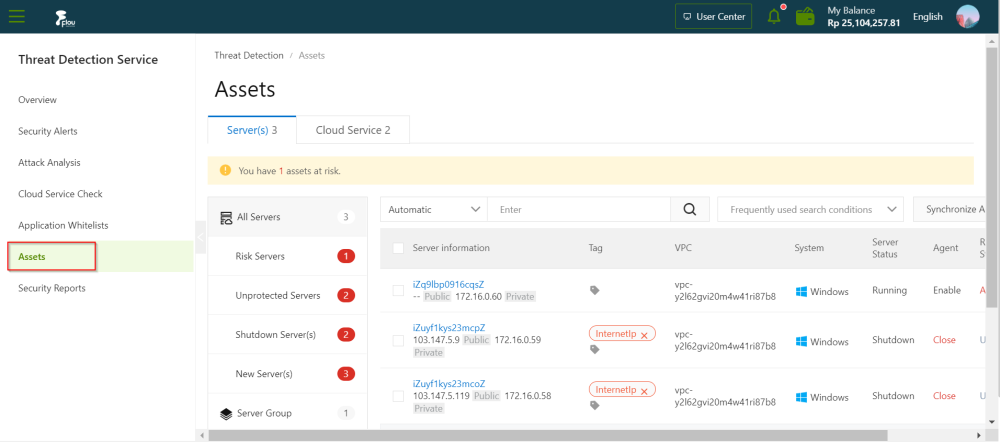
On the Cloud Service tab and Server(s) of the Assets page, click on the Asset and view the details of the asset.
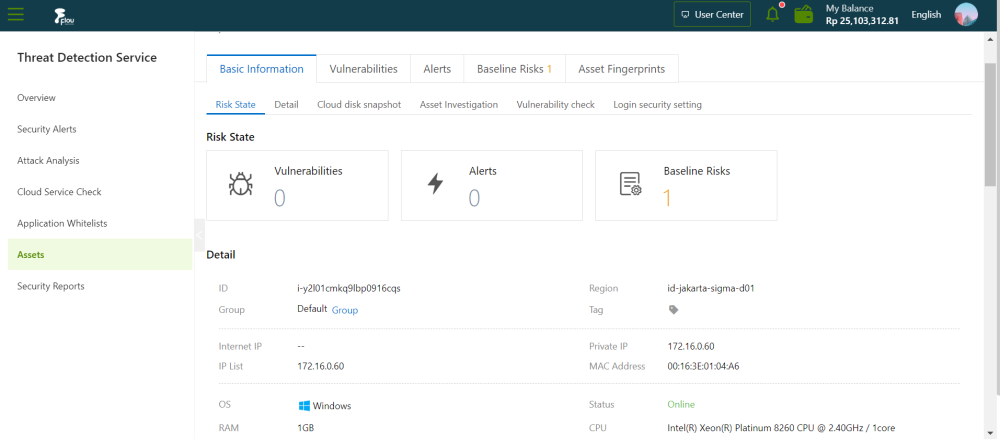
On the asset details page, click the Basic Information, Vulnerabilities, Alerts, Baseline Risks, or AssetFingerprints tab to view relevant details . The following list describes the details of the asset:
Basic Information: This tab consists of sections in which you can view asset details and manage an asset.
- Risk State: This section displays the numbers of vulnerabilities, alerts, and baseline risks on the asset. You can click the number under Vulnerabilities, Alerts, or Baseline Risks to view the details.
- Detail: This section displays information about the asset configuration and security protection settings, and allows you to manage asset tags and groups.
Change asset groups.
Click Group. In the Group dialog box, select a new group and click OK.
Modify tags.
Click the icon. In the Add tag dialog box, select a tag and click OK. You can click the icon in the right of a tag to delete the tag.
- Asset Investigation: This section displays the fingerprints of an asset. You can click the number under an item to go to the Asset Fingerprints tab to view the details.
- Vulnerability check: This section displays vulnerability check items that are enabled or disabled for an asset. You can enable or disable different types of vulnerability checks for the asset. The vulnerabilities include Linux software vulnerabilities, Windows system vulnerabilities, Web CMS vulnerabilities, and urgent vulnerabilities.
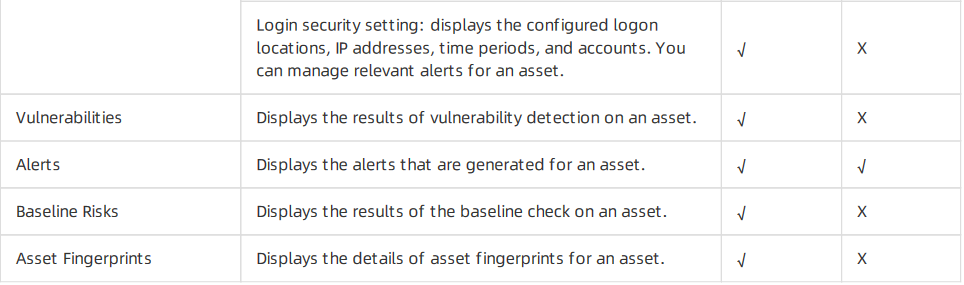
- Login security setting: This section allows you to specify approved logon locations, configureadvanced logon settings, and turn on or turn off alerting for unapproved IP addresses, time, and accounts. The advanced logon settings include approved IP addresses, time periods, and accounts. You can also specify approved IP addresses, time periods, and accounts for a specific asset.
- Vulnerabilities: This tab displays vulnerabilities detected on an asset.
- Alerts: This tab displays alerts generated for an asset.
- Baseline Risks: This tab displays baseline risks of an asset.
- Asset Fingerprints: This tab displays the fingerprints, including ports, processes, software, and accounts of an asset.
You can manually collect the latest fingerprints of an asset.
- You can click the Port, Software, Process, Account, or Scheduled Tasks tab. In the upper- rightcorner , click Collect data now.
- In the Collect data message, click OK.
After the data collection task is submitted, it takes one to five minutes to collect the fingerprints of the required asset. After the data collection task is complete, you can view the latest fingerprints of the asset.